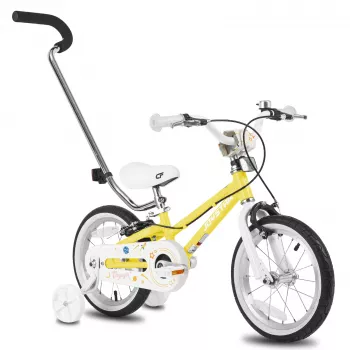
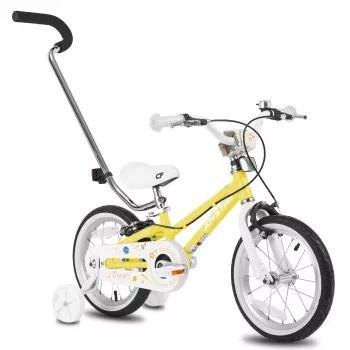
A first “big kid” bike should feel stable, easy to handle, and simple for parents to support. Our Lightweight 14 Inch Kids Bike with Training Wheels and Push Handle is built for early riders who are still learning balance and steering, with training wheels for confidence and a parent push handle for guided practice. Below, our team walks you through who this style of bike fits best, how to set it up for safer rides, and how to help your child progress from assisted starts to independent pedaling. For more guidance, see Best Bikes for Toddlers: Updated Picks.
When kids are learning to pedal, small frustrations add up fast—especially if the bike feels heavy or awkward. A lighter bike is typically easier for your child to start rolling, steer at slow speeds, and stop without feeling “tipped over” by the bike’s own weight. That can make early practice sessions calmer and more productive. For further reading, see Balance Bike vs. Training Wheels.
Less weight also helps with the most common learning moments: pushing off from a standstill, correcting a wobble, and making gentle turns without over-steering. Training wheels add stability while your child builds pedaling rhythm and learns how the handlebars respond; the goal is steady confidence, not speed.
The parent push handle adds another layer of support. Instead of grabbing the seat or leaning over, you can help with guided starts and light corrections while your child stays focused on pedaling and steering. As skills improve, you can reduce how much you help—without changing the routine or the bike.
Fit matters more than age labels. The most important checks are stand-over comfort and reach: your child should be able to sit on the saddle and hold the bars without stretching or locking their arms straight. A relaxed posture makes steering and braking much easier for new riders.
A simple home test: with you holding the bike steady, your child should be able to place at least the balls of both feet on the ground while seated. Some confident riders prefer a higher seat for pedaling efficiency, but early learners usually progress faster when they can touch down easily to start and stop.
| What to measure | Good sign for early learners | If it doesn’t fit well |
|---|---|---|
| Seated foot reach | Child can touch down to stop comfortably | Lower the saddle or consider a different size if still too tall |
| Handlebar reach | Elbows slightly bent, shoulders relaxed | Adjust bar position if possible; avoid a stretched posture |
| Stand-over feel | Child can straddle the bike without discomfort | A cramped or too-tall stand-over can reduce confidence |
| Control at walking pace | Can steer and brake without wobbling | Recheck fit, tire inflation, and training wheel alignment |
Start small and predictable. Short sessions on flat, open surfaces—like a driveway, a quiet sidewalk, or a smooth path—help your child focus on the basics without surprises. Use the push handle primarily for steady starts: help them begin pedaling, then ease off as soon as they have momentum.
Keep guidance gentle. Avoid steering the bike with the handle; instead, let your child point the bars where they want to go while you provide balance and pace control. This helps them connect “I turn the bars, the bike turns” without feeling like the bike is being moved for them.
Training wheels should support confidence but not “lock” the bike perfectly upright. Proper setup usually allows small, natural leans during turns. If the bike feels like it’s rocking side-to-side sharply, the training wheels may be uneven or too low—minor alignment changes can make practice feel much smoother.
Practice stopping early, not last. Teach your child to look ahead, ease off pedaling, and brake calmly. Stay close with the push handle until stopping becomes consistent and predictable.
Focus on clean starts, straight riding, and smooth stops with full training wheel support. Aim for short wins: one good start, one calm stop, repeat.
On a safe surface, reduce how much you help with the push handle. Support at the start and during tight moments, but let your child do more of the work once rolling.
Check seated foot reach, relaxed handlebar reach, and whether your child can start and stop confidently. Height and age ranges are only rough guides, so a quick at-home fit test with you holding the bike steady is the most reliable way to confirm comfort.
Use it mainly for steady starts and gentle support while your child steers. Keep sessions short on flat ground and gradually reduce how much you assist once your child can pedal smoothly and keep a straight line.
Look for smooth straight riding, controlled turns without heavy training wheel contact, and confident stopping. A gradual transition works well: raise the training wheels slightly first, then remove them once your child can start and stop reliably while wearing a helmet.

Leave a comment